Pages

Subscribe:
Showing posts with label Homemade. Show all posts

Wednesday, 4 December 2013

Deck The ...Halls Doors with a Home-made Wreath


Well I started off this wreath project with another idea completely.  I was planning on making the Christmas candy wreath I saw over on Pinterest HERE.  I tried about 7 times to make this but I was having a huge brain fart and was unable to understand how to tie on the candies so they would look full even after pushing them together.  I was super frustrated and had already promised my son I would be making him a wreath for his new place. 

So after much deliberation I used a small Styrofoam wreath form I had and covered it with Green yarn I had laying around.  To do this I would hot glue to the start of each 3 foot length of yard and place all glued start and endings on one side so the other side is neater and better to use as your 'front'.  Keep doing this till the wreath form was covered.  Please note that when doing this wrap around, that the inner circle is smaller so you will have to push the sections over a bit and there could be some overlapping on the inside.  Try and make sure that the overlapping is not too noticeable. 

Then I went to a few shops in my area to look for small decorations for the wreath.  I found a bunch of supplies that were meant for larger wreathes but I cut everything so it would be better proportional.  I hot glued my center leaves and decorations first as they are the focal point of the wreath.  I also used some of the glittered stems from the leaves as décor for the top of the wreath.  Waste not want not right? LOL

Then I gathered some of my colored craft wire and using the red wire I glued a small glittered red ball to the end and then wrapped the other end around the wreath form, so it would dangle in the middle of the wreath.  I also added one gold ball with gold craft wire to either side of the red ball.

I then looked for some more greenery and found these holy pieces.  They were originally part of a Christmas bell ornament that had these holly glued to the front.  They were super easy to take off and if by chance the red holly berry popped off, its super easy to glue them back on.

I also found some cute small ornament balls that  I attached to a 20 gauge gold wire and inserted into the foam wreath at the bottom. 

The inspiration for this wreath was actually the "Believe" sentiment I found in my crafts.   I painted it gold as they came in silver glitter and that would not work well with the colors I have going on.  Also my  son and his room-mate want mostly red and gold Christmas décor.  Can you imagine 2, 22 year old's, being so specific with their decorating wishes.  LOL I am getting such a kick out of how proud they are over this home and the pieces they put in it.  My boy is finally growing up!  Which is awesome, and a huge stress off my shoulders let me tell ya.

So I waited and waited overnight even, for the gold paint to dry but even after completing all but this step on my wreath.  I finally decided to just use the gold glitter glue on the wet gold paint.  I used Crafts Fine Glitter Glue and a small paintbrush to spread the glue to the edges of my word. 

I am sorry that I didn't take any pictures during this craft but I didn't think it would be such a process LOL.  In all honesty it went quick once I changed my plans and figured out the design. 


Have you ever made a wreath? Have you blogged about it?  Leave me a link in the comments below so I can go drool over your wreaths and others can get inspiration for their wreath making this year.  If you haven't blogged about a wreath but have pictures, please feel free to share them with us also.

Monday, 25 November 2013

Best Gluten Free Christmas Cookies


I must admit that this article started out with just your best of Christmas cookies till I found a gluten free one and this idea blossomed.  I do feel bad that a lot of the time those with Celiac end up missing out on holidays and goodies due to their very limited diet.  To bring a bit of holiday spirit to those suffering this holiday I bring you the following post.

We found out this year that one of G's kids has Celiac disease.  If you have never heard of this or don’t really understand what this disease entails I will leave a few links below for you to check out.


Normally my plan each year is to make Christmas cookies to give the kids each year but my health has always stood in the way.  This year since I am feeling much better, I would love to make cookies but time and the holiday uproar may make this impossible.

So I am going to make a small recipe book for her with some of the best gluten free Christmas cookies recipes.  Below are some of the more traditional cookie recipes I found.


 1. Molasses Spice Cookies - Recipe from Celiac.com


2. Lofthouse Style Sugar Cookies - Recipe from LynnsKitchenAdventures.com


3. Snickerdoodles - Recipe from BettyCrocker.com


4. Cinnamon & Brown Sugar Icebox Shortbread - Cookitallergyfree.com


5. Gingersnaps - Recipe from Gutenfreegoddess.blogspot.ca


6. Coconut Macaroons - Recipes from Theprimalist.com


7,  Chocolate Snowballs - Recipe From Themommybowl.com


8.  Peanut Butter and Jelly - Recipe From elanaspantry.com


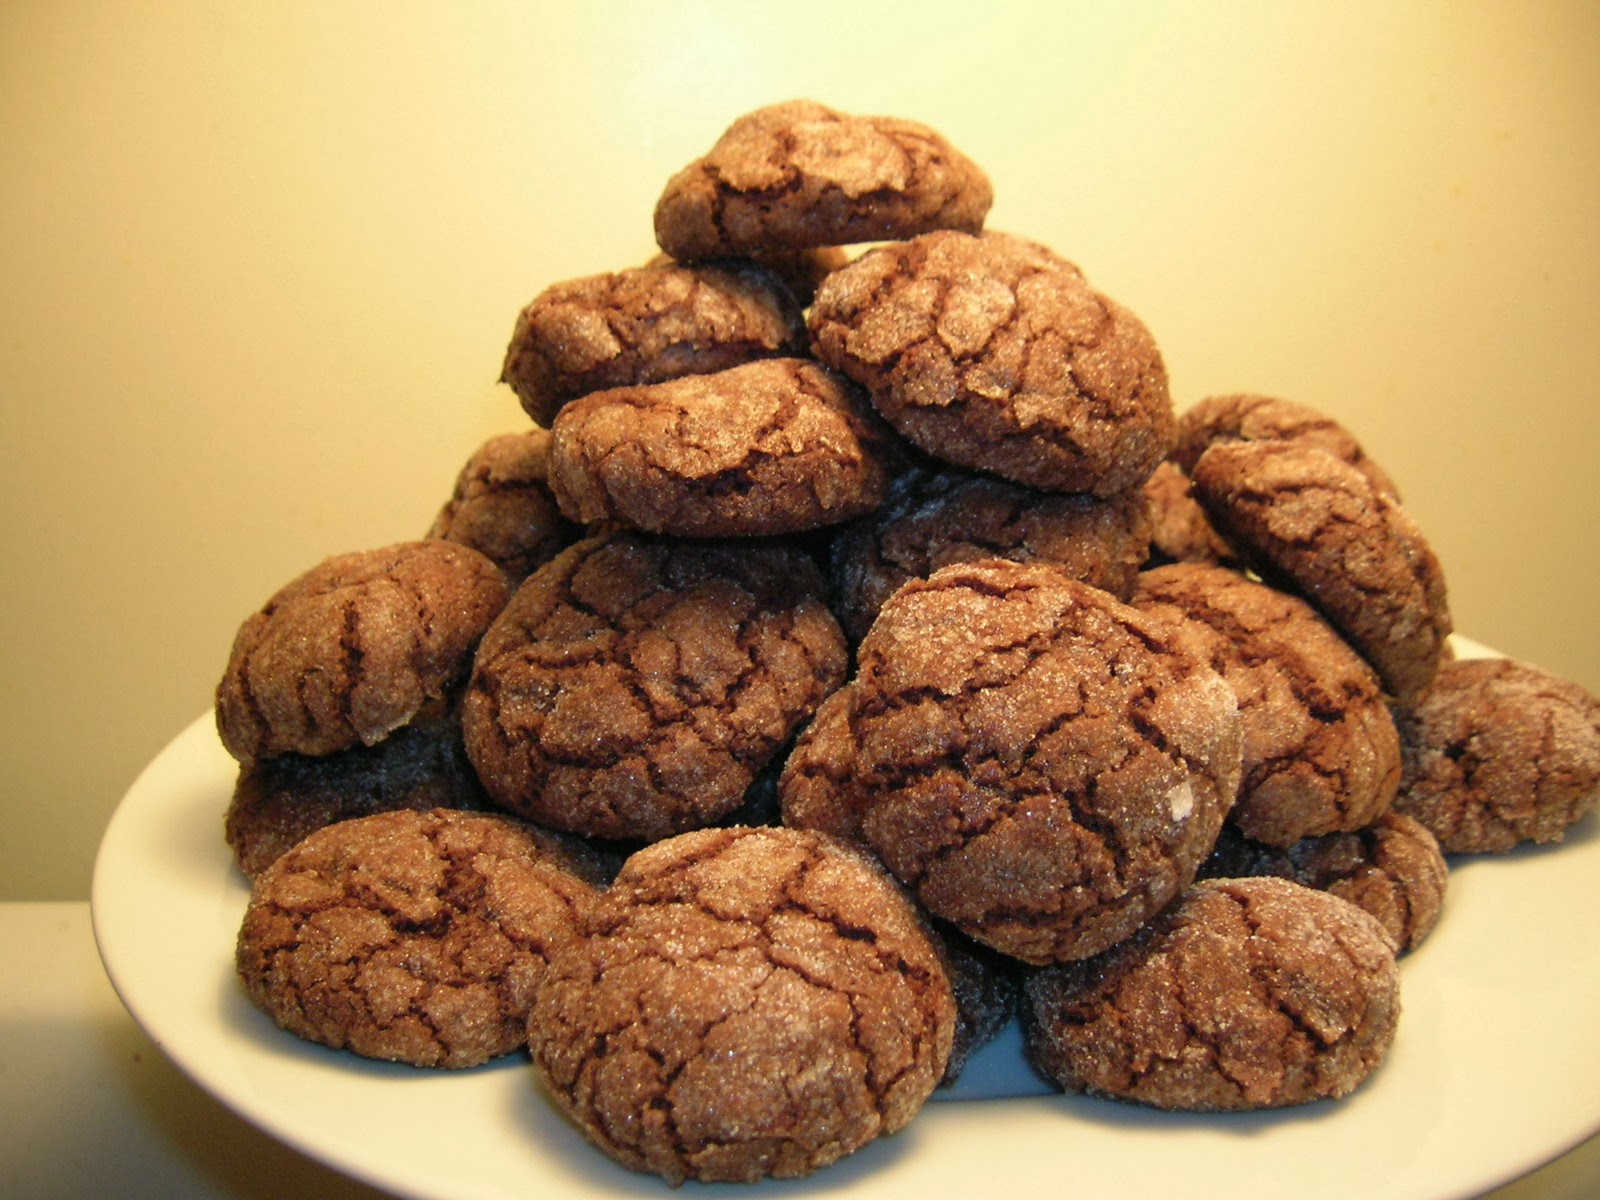
9.  Chocolate Crinkles - Recipe from heythattastesgood.com


10.  Chocolate Thumbprint Cookies - Recipe from glutenfreeonashoestring.com


Do you know someone with Celiac?  Remember that a lot of people these days have dietary restrictions.  I hope that this round up will help you to include them this holiday.  If you try any of these recipes I would love to hear how they went and your critiques. 


Wednesday, 31 October 2012

Shampoo and Conditioner


Today is the last day of Homemade Solutions.  I have had a lot of fun and I hope that you all enjoy these recipes and learn to make things for your home that you know all the ingredients of to help purify our lives of unknown ingredients all around our home.

So back today… today I will be offering a couple ideas for homemade shampoo and conditioners.


Shampoo:
I have found that a lot of people online are using a baking soda shampoo.  Due be aware that people say it does take your hair a while to get used to the change but eventually it is said to work and you only need to wash a couple times a week.

1 tbsp. baking soda
1 cup warm water

Mix both ingredients well and shampoo your hair.
Next shampoo recipe:

1 cup pure liquid castile soap
1 cup green tea (brewed for 30 minutes)
1 tbsp. olive oil
1 tsp. honey

Use as is.

Conditioner:
This is another recipe that many are using.  It consists of an ingredient we all can find in our supermarkets.  It is said to also aid with tangles.

Dilute 1 tbsp. of apple cider vinegar to a cup of water. 

We even have shampoo and conditioner combos we can make:

1/2 cup Organic castile soap (liquid)
1 tbsp. Apple cider vinegar
3/4 tbsp. Tea tree oil, Vitamin E oil, Olive oil (chose either a combination or just one)
Drops of essential oils: lavender, eucalyptus, etc. (optional)
1/8 cup of water
1 container

Combine ingredients together.  Rub thoroughly into hair to activate suds and then scrub scalp.  This shampoo/conditioner combination is more liquid than standard hair products.  You could use this in a spray bottle to apply if you would like.

To know if this is working properly, your hair will more oiled.  This is a good option for those with dandruff.
Another Conditioner:

2.5 cups hot water
1/2 cup apple cider vinegar
1/4 sprig of rosemary
1 bag of your favorite herbal tea for fragrance

Place the water in a container of your choice.  Then, add the rest of the ingredients.  Let the mix sit for 30 minutes.  Use about 3/4 cup of the rinse each time you condition, shaking bottle prior to use.

Another recipe for 2 in 1:

Blend one fresh peeled lemon with one peeled cucumber in the blender and pour out into a jug.  Mix into your hair, massaging well, and rinse thoroughly.

Cucumber: conditioner agent
  • For dry hair add more cucumber
Lemon: Cleansing agent
  • For oily hair add more lemon
(it can be difficult to wash it out properly.  The tiny flakes of lemon can get stuck in your hair)

Have you ever tried to make homemade shampoo and conditioner?  Do you have a favorite or new recipe?  Please let us know what you think of these.

Thanks for stopping by,
Kylara

Tuesday, 30 October 2012

Dry skin magic.....body oils


Body oil is a skin care product that is generally recommended as treatment or prevention of extremely dry skin.  It provides dry skin with a shine and luster.

  Good body oils contain only natural ingredients.  The best way to ensure the products are natural is to make them yourself.  Usually you can do it at home at a fraction of the cost.  You can also use this product as a shaving cream. 


Basic body oil

Ingredients
  • Vitamin E
  • Jojoba oil
  • Almond oil
  • Distilled water
  • Sweet orange essential oil
  • Vanilla essential oil
  • Neroli essential oil
  • Lemon essential oil
  • Bergamot essential oil

     Buy all the ingredients from a whole foods store.  Almond oil, distilled water and Vitamin E are available even in supermarkets.  Essential oils can be purchased in a few places.  I know that there are some essential oils for sale in my bulk barn store.  You can also look at stores that sell makeup ingredients.  If you are unable to find these ingredients in your area stores, they are available for purchase online.

     Combine 10 drops of each essential oil in a glass bottle and allow to mellow for at least two to three days.  This will enhance the individual fragrances, making the find finished body oil more aromatic.

     Add 4 ounces of distilled water, 3 ounces sweet almond oil, 2 ounces of jojoba oil and a tsp. of Vitamin E to the glass bottle containing the oils.  Gently shake the bottle to blend the ingredients.

     Pour a few drops of the body oil into your palm.  Rub your palms together and apply the lotion anywhere on your body that you need extra moisturizing.  Store in a cool dry place.  Refrigeration does prolong the shelf life of your body oil.

Below is a link to a site that has multiple recipes as well she pairs her oils with body powder for gifts.  Do check out her site it is very informative.


Do you use body oils?  Have you ever consider or made any homemade body oils?  If so please feel free to share your recipes and let us know which is your favorite body oil scent?

Monday, 29 October 2012

Disappearing Water Rings


I am sure  most of us have come across this problem in their lifetime.  My mother is very OCD with cleaning and as a child I didn't really think before I did things and I know that I have left rings in my wake.  But it doesn't mean that the furniture piece is ruined.

First thing you need to do is determine if the furniture piece is an antique.  If it is, please call an antique specialist.  Also call if the water rings have turned from white to black.

There are a multitude of suggestions online on methods to clean this nasty stain off our furniture but the most popular and successful methods is the following.


First go grab your iron and a clean cloth.  Place the cloth upon the stain and once your iron is heated (low heat, no steam setting) place the iron on your cloth for a few seconds.  Be careful to not let any of the heated surface of your iron to touch the wood directly.  The low heat will warm the finish on the furniture to release the moisture into the towel. 

Be sure to check the progress of the water ring removal and repeat the ironing process until the mark has disappeared.  Finish by polishing and buffing the wood furniture as normal.

This method is by far the most popular and the most successfully used.  I hope that you will be able to use this tip in the future.   Have you tried to remove water rings on your furniture before?  What method did you use?  Have you tried the above tip before, if so please let us know how it worked.

Sunday, 28 October 2012

Unclog your home..the cheap way


I'm sure you have all had your drains clogged at some point.  If you go to the grocery store to get a product to help you clean your drains, you will notice that 1) they are quite expensive and 2) Each store bought drain cleaner  is full of strong chemicals some of which we have no knowledge of.  Commercial drain cleaners are among the most dangerous of household cleaners.

  • They can be fatal if swallowed
  • Can damage your skin such as burns to the outside of your body as well as tissues inside your body
  • It can cause blindness if the product gets directly in your eyes
  • They are very harmful to our environment
  • Store bought solvent based cleaners can contaminate drinking water and damage septic systems

What if you are strapped for cash?  Well below you will find some information about homemade drain cleaners and you probably have the ingredients already in your pantry. 

When using home methods to clean our clogs, one method that people are using, I must warn you about.  You need to avoid cleaning your pipes by blowing a large amount of air through them to dislodge the clog.  This will most likely result in burst pipes so I warn you NOT to do this for any reason.


This homemade cleaner is very basic and easy to make and only consists of 3 ingredients.

1 cup of baking soda
1 cup of vinegar
Boiling water

     Toss in 1 cup of baking soda, and pour down a cup of vinegar, and put your stopper in the drain and let it sit for 30 minutes.  Remove stopper and pour a kettle of hot water on top.  Double the recipe amounts  and give it an hour then dump more kettles of boiling water (2-3 times) to completely clear out the gunk.

The following is a monthly preventative measure you can use to prevent a build up in your drains.

     Once a month you should do some easy maintenance on your drains by adding 1 part baking soda, 1 part salt and 1/4 part cream of tartar.    Doing monthly clears out any fat, grease and nastiness that buildup to help prevent clogs.

  • Pour 1/4 to 1/2 cup of this mixture into the drain and dump a kettle full of boiling water down the drain

  • Run hot water from the tap for a couple of minutes, and then turn to cool water and run a few more minutes

Hopefully this will help you save money in your home on drain products and plumbers.  Have you ever tried this on your drains?  If so did it clear your drains out well?  Do you prefer to use products that you know what all the ingredients are?

Saturday, 27 October 2012

Save big with homemade eye shadows!!!


Ok, this one gets me all caught up again LOL.  This writing daily for a month is not as easy as some may think.  I am looking forward to showing you all the projects I have been working on during this month. 

Back to today's topic.  Cream Eye shadow


First recipe:

Find a small container for your cream shadow.  This could be an old contact lens case or a small container with a lid.

Scrap the color of eye shadow you want to use into the container.  Use something flat to do this such as tweezers, a butter knife, your fingernail. 

Add a small amount of a binder such as lotion or petroleum jelly.  The binder is what will ultimately make your eye shadow creamy and able to stick to your eye lids. 

Here are a few things to consider:
  • Add less than you need of the binder at first - remember its easy to add more later then take things out of the mix.
  • Use lotion, if you want to add a bit of sparkle to plain eye-shadow, try using shimmery lotion
  • Or use, Vaseline.

Mix the eye shadow with your finger or a cotton swab.  It should start turning to a creamy consistency.  Keep mixing and try to break down all of the large clumps. 

Store in a container with lid.

Tips:
  • Buy cheap eye shadow to use as your base color at the dollar store
  • Place a small dab of your new eye  shadow on your wrist to check for a reaction.  If you are ok, apply to your eye lid.

Second Recipe:

You need:
  • Some lipsticks ( if this is your first time making this you may want to use a lipstick that you don't use anymore
  • Some empty cosmetic jars
  • Vaseline Petroleum jelly
  • A butter knife
  • Candle or stove for heat
  • Some spoons (one small and one bigger)

Cut the lipstick you want to use with a knife in a desired amount, and place it on the big spoon.
Add some Vaseline.
Do not mix the products yet, because it will be sticky and create a mess.
Light the candle or turn on the stove.
Place the big spoon above the candle, and wait until the products melt.
Stir with the small spoon until its all mixed together.
Pour the mixture into the jar.
You might want to leave it open for about 10 minutes and then put it in the fridge for about 30 minutes.

All done!

Tips:
  • You can add any color you like because we all have that lipsticks that are too dark, too bright, too pink etc, so you can mix them with others colors to make your own shade.
  • Can be used on lips, eyelids, and even cheeks.
  • Add an eye shadow base to help prevent the product from creasing.

Recipe for eye shadow base:

  • Moisturizer (preferably intended for eyes)
  • Liquid foundation in your skin shade or lighter
  • A container with lid. Such as empty blush containers.  Please try and sterilize the container before use.
  • Something to combine the ingredients such as tweezers or butter knife

In a bowl combine cream of your choice (perhaps three times what you would use for your face).

Add the liquid foundation.  The ration of powder and cream should be approximately 1:3.  The cream allows faster absorption of powder.

Mix ingredients with your tweezers.  This dilutes the powder that will be applied to the eyelid, gathering in the folds within 30 minutes.

Please date your jar as the product has approximately a month shelf life.


I recently purchased some of the new 24 hour Tattoo stuff and I love it, but I am eager to make tons of eye shadows so they are customized to the look that I am going for.  We all know how expensive our makeup is… and this gives us another opportunity to use those colors, in our compacts, that we never use, and with them create unique shades to our hearts content.

Let me know what is your favorite cream shadow color?  Have you ever tried to make this at home?  What price do you usually pay for this product?

Bath Cookies (not edible!) LOL


I think that I will be making these to go into some gift baskets I am making for Christmas.  I know that the girls will love these and I hope that you will too.


Chocolate Chip Bath Cookie

2 cups of sea salt or rock salt
1/2 cup baking soda
1/2 cup cornstarch
2 tbsp. almond oil
1 tsp. vitamin E oil
1-2 eggs
6 drops essential oil

This recipe makes 10-12 cookies depending on size.

Mix all the ingredients together in a bowl.  Cut the cookies out with cookie cutters or flatten balls to form a cook shape.

Bake at 350 degrees for 10-12 minutes.  Allow to cool.

Use 1-2 per bath by adding them to running water.  Sprinkle with chocolate sprinkles or chips.

If you wrap these in air tight packaging or seal them in an air tight container, these cookies will last for several months maybe longer.


Chocolate Lavender Bath Cookies

2 ounces cocoa butter
2 ounces extra virgin olive oil
1 cup oatmeal, fine
1/4 cup whole milk powder
1/4 cup hot chocolate mix
3/4 cup Epsom salt
1 cup cornstarch
1 cup baking soda
1/2 cup citric acid
1 tsp. lavender essential oil

Warm the cocoa butter and extra virgin olive oil in a hot water bath until completely melted.  Remove the cocoa butter and oil from the heat, allowing it to cool slightly, but not to harden.

Next, line a small baking sheet with waxed paper and set it aside. In a medium mixing bowl, combine the oatmeal, whole milk powder, hot chocolate mix, cornstarch and Epsom salt.  Stir the ingredients well, making sure to break up any clumps in the powder.  You may want to grind the oatmeal in a blender or food processor to achieve a fine consistency. 

In a second mixing bowl, combine the baking soda and citric acid.  Make sure to work out clumps in mixture.  Combine the bowls of dry ingredients and mix well.  Add the lavender oil to the melted cocoa butter and olive oil.  Pour the liquid mix into the dry ingredients. 

Begin stirring and kneading the mixture immediately.  You must work quickly at this point to get the cookies formed and placed onto the baking sheet.  Using your hands, form tablespoon sized balls of the mixture.  Place the balls onto the baking sheet then press them down gently, flattening the top. 

They should be similar in shape to a gingersnap or sugar cookie.  Continue shaping cookies with the remaining mixture.  All the cookies to harden for a full 24 hours before attempting to remove them from the baking sheet. 
After 24 hours the cookies should be hard enough to be handled and packaged.

These should be stored in a tightly sealed bag or container.  Moisture or humidity can cause the cookies to fizz or "flower" prematurely.  They look adorable in Cello bags or 1/2 lb. tin tie bags.

To use these cookies, simply drop one or two into a warm bath.  They will fizz and bubble, filling the bath with the delightful aroma of lavender and chocolate.


Rainbow Sprinkle Bath Cookies

20-30 drops FD&C Yellow #5
3/4 cup Epsom salt
1 cup fine oatmeal
1/4 cup whole milk powder
1/4 cup honey granules
1 cup cornstarch
1 cup baking soda
1/2 cup citric acid
2 ounces mango butter
2 ounces organic virgin coconut cream oil
1/2 ounce Easter cookie fragrance oil
1/2 tsp. assorted or solid colored jojoba wax beads

(The last two ingredients contain synthetic components can be left out if desired.  Natural herbs can be used to top the cookies, and vanilla absolute can be used to scent them.  Leaving out the FD&C dye will only alter the color slightly, so a substitute isn't necessary.)

Line a large baking sheet with wax paper or plastic wrap and set it aside.  Pour Epsom salt into a large mixing bowl and color generously with the FD&XC Yellow dye.  You'll need about 20-30 drops to dye the salt a bright yellow.  Mix the salt thoroughly to make sure that it is evenly dyed. 

Next, add the whole milk powder, cornstarch and oatmeal, breaking up any clumps in the powders.  Add the honey granules next. 

In a small heat proof container gently melt the mango butter and organic virgin coconut oil.  You can either use a double boiler or a microwave to do this. 

If you use a microwave, be sure to melt the oils in short 20 - 30 second bursts.  Be careful not to overheat and damage the oils.  When the oils are melted, allow them to cool for a few moments before adding the Easter cookie fragrance oil to them.

Next, add the baking soda and citric acid to the large mixing bowl.  Mix the powders thoroughly then add them melted oils mixture, stirring constantly.  After the oils and powders are mixed, wipe the mixing spoon clean and continue to knead the dough with your hands.  This will make sure that all the ingredients are completely mixed. 

Using your hands, form small round balls out of the dough.  Drop them onto the baking sheet and press them with your hands to form cookie shapes.  Continue until all of the dough is used. 

This recipe will yield about 2 dozen 2 inch cookies.  Allow the cookies to dry and harden for several hours before attempting to move or package them.  They will harden completely when left overnight in a cool, dry place.

Package in small cello bags, using a ribbon to tie close the bag. 

To use, simply drop one or two into a warm bath. 

Hope you enjoy these.  If You decide to make them please come back and let us know which one is your favorite.

Hand Lotions


I know that the 25th is technically over for me, but I had a busy busy day, and so much is swirling around in my head, I have been unable to sleep..  So I thought I would come in and post today's yesterday's post.   Hopefully I will be able to find some time to tell you about my day that I just had.  But I will probably do that tomorrow on a post of its own.

Anyway, a lot of us need hand lotion, people who often use the bacterial pump at hospitals, doctor's offices etc.; the elderly, the young, the germaphobes and the list could go on and on.  But the one ingredient that seams to be in most of those solutions is alcohol, which can smell very strong.  Our hands are drying out and using a quick and easy lather of lotion will have your hands nice and soft like a baby's bum.


Here are a few recipes to try out.    

Easy Lotion

1 1/4 cup hot water
1/4 cup emulsifying wax (don't use beeswax)
1/4 cup olive oil
24-36 drops of essential oil

In a Pyrex/glass measuring glass, combine the olive oil and emulsifying wax and microwave on high for 1 minutes until it is all melted.  The temperature should read about 155 degrees.

While that is heating up , add the essential oil into the melted wax/olive oil mixture.  Then pour hot water into the mixture and watch it turn a milky white.  At this point the temperature is about 125 degrees.  Pour the hot lotion into a wide mouth pint jar and let it cool overnight.  The next morning you'll have a fresh jar of homemade natural hand lotion.

Oooops.  I fell asleep writing this post the other night and its been super busy since.  Sorry about that everyone.

Herbal Moisturizing Cream 1

1 ounce vitamin E oil
4 ounces sweet almond oil
1 ounce beeswax
1 ounce jojoba oil
1 ounce coconut oil
1 tsp. oil of calendula
1/8 tsp. oil of chamomile
1/8 tsp. oil of rose geranium

Combine the vitamin E and sweet almond oils in a nonreactive saucepan.  Heat over low heat (do NOT boil).  Gradually add the beeswax, stirring constantly.  Add the jojoba oil, a little at a time, and stir until well blended.  Slowly stir in the coconut oil.

Remove the saucepan from the heat.  Add the calendula, chamomile, and rose geranium oils, stirring the mixture until it is smooth.

When the mixture has cooled, pour into colored glass jars and seal them tightly.  Keep refrigerated
.

Herbal Moisturizing Cream 2
*makes 2 cups*

*to add a fragrance to this, use essential oils of your choice, the following were recommended scents.  A few drops of rose, jasmine, or lotus oil, and for men the sandalwood or mint*

1 cup fresh rosemary leaves
1 1/2 cup fresh comfrey leaves
3/4 cup fresh lavender or patchouli leaves
1/2 cup olive oil
16 ounces anhydrous lanolin
Aloe vera gel (optional)

With a mortar and pestle, bruise the herbs with a small amount of olive oil.  In a nonreactive saucepan over low heat, melt the lanolin with the remaining olive oil.  Remove the pan from the heat.  Let the mixture cool for 5 to 10 minutes, then stir in the herbs and aloe vera gel.  (Heat breaks down the allantoin in the comfrey, a substance that promotes new cell growth, and destroys the healing properties in aloe vera.

Strain the mixture through cheesecloth and pour it immediately into heat-resistant jars.  Thick blue, green or brown glass jars protect the mixture from light and make attractive gifts.  Store in the refrigerator.

What are your favorite scents used in hand cream?  Have you ever attempted to make a homemade version?

Wednesday, 24 October 2012

Various Bath Recipes


The recipes I am going to show you came from somewhere online, but I am not sure of the original source.  I apologize for not saving this information.


4 cups of red wine
1 cup of honey

Add to bath. 

Coconut Bath Soak

1 cup Oatmeal
1 cup Brown Rice
1 tsp. Coconut Extract
Contents of 5 black tea bags
1 cup Powdered Milk
Cheesecloth

Mix ingredients in a bowl, then cut in half.  Cut two 8 inch squares of cheesecloth and pour half of the mixture into each square.  Tie at the top with pretty string and or ribbon. 

To use:  Toss one pouch into the bath under running water.  And now enjoy.

Lavender Bath

2 tbsp. lavender flowers
3 tbsp. bay leaves
4 tbsp. fine oatmeal
4 tbsp. bran
4 cups distilled water

Blend oatmeal in a blender or food processor until finely ground.  Mix all ingredients.  Simmer, covered, for one hour.  Strain; cool.  Add to bath.

Detox Bath

1/3 cup Epsom salts
1/3 cup Sea Salt
1/3 cup Baking Soda
2 1/2 tsp. Ground Ginger
1 cup Apple Cider Vinegar

Combine all of the dry ingredients in a bowl.  Draw a bath with water as hot as you can stand it.  Add bowl of dry ingredients and vinegar.  Stir well.

Soak in tub for 30 + minutes.

I hope you enjoy these lovely recipes and they encourage you to relax and give your self some TLC after your busy home-making days.  If you have a favorite bath recipe please let us know!  Do you use bath solutions often?

Thanks for stopping by, 

Tuesday, 23 October 2012

Carpet cleaning the homemade way...


I have 2 dogs at home, and there are times that they leave me tracks upon my carpets or furniture on wet days.  It doesn't happen as often anymore but when it does I just hate to use those strong smelling cleansers every time.  Although I personally like the smell of clean, but not a heavy scent.


Below you will find recipes for steam cleaning, spot removal and deodorizing formulas. 

Steam Cleaning Solutions

  1. Combine equal parts of warm water with white distilled vinegar.  Add 1 tsp. of liquid castile soap and mix thoroughly.
  1. Mix together 1/4 cup vinegar, 1/4 cup liquid homemade laundry soap or bought laundry soap, and 1 gallon of water and add to carpet cleaner.  


Spot Removal

  1. You can use the exact same formula as 1. in the steam cleaning section but place it into a spray bottle.
  1. For tough stains, create a paste of 1/4 cup borax, 1/4 cup distilled white vinegar and 1/4 cup salt.  Rub into the stain and leave until dry.  Vacuum it up when thoroughly dry.
  1. Add 1 tsp. clear liquid dishwashing detergent to 1 cup of warm water.  Pour into a spray bottle and spray it on a damp rag and wipe stain.


Carpet Deodorizer

  1. Sprinkle baking soda on the carpet and leave overnight, then vacuum it up the next morning.  Baking soda absorbs odor.
  1. Mix 2 cups baking soda, 10 drops of favorite essential oil.  Sprinkle over carpet and let sit for 30-60 minutes.  Vacuum.

Hopefully you enjoy the recipes and your carpets are safe from future spills/messes .

Do you use homemade carpet products?  What are your favorite must have recipes?